> For the complete documentation index, see [llms.txt](https://docs.sprinthub.com/llms.txt). Markdown versions of documentation pages are available by appending `.md` to page URLs; this page is available as [Markdown](https://docs.sprinthub.com/en/topics/relate/message-templates-meta/legacy/message-templates-how-to-create-and-send-for-approval-within-sprinthub.md).
# Message Templates - how to create and send for approval within sprinthub
### What are Meta Business Message Templates?
Message templates in Meta Business are pre-formatted messages that can be sent automatically or manually to customers. They are especially useful for quick responses to common inquiries, status updates, reminders, and other types of frequent communication.
### Benefits
1. **Efficiency**: Reduces the time needed to answer frequently asked questions.
2. **Consistency**: Ensures that all messages sent are consistent and professional.
3. **Personalization**: Templates can be customized with specific customer data for a more personal approach.
4. **Automation**: Allows the automation of responses to certain actions or events.
{% hint style="danger" %}
It is necessary to have the WhatsApp API and the Growth plan to use the message template.
{% endhint %}
### Step by step
**Step 1: Access the SprintHub dashboard**
Within the system settings, in the last field is the message template
**Step 2: home screen**
Where all your messages that have already been approved or are still awaiting approval will be located. let's create a "new template"
**Step 3: New template setup**
After clicking to create the new template, you will need to define the following fields:
**First name**: Define a name for the template to help identify it easily.
{% hint style="danger" %}
**Spaces, uppercase letters, accents, or special characters are not allowed (except \_).**
{% endhint %}
**Language**: Select the language of the message.
**Category**: we have the following options:
* Marketing: for offers and promotions.
* Service: questions and problem resolution.
* Authentication: confirm users' identities.
{% hint style="danger" %}
Remember that the category must be correct for Meta approval.
{% endhint %}
**Header**: Create a header for the message. It can include, for example, the company or organization name, order number, or any other relevant information to provide context for the communication. In addition to the Text format, the header can also be in video and image format.
{% hint style="warning" %}
Be aware of the allowed video and image sizes.
{% endhint %}
\
**Step 4: Message body**
**Variables** : They are placeholders for dynamic information that will be filled with specific data when the message is sent. These variables allow you to personalize the message for each recipient, making it more relevant and specific. For example, in an email template, a variable can be used to automatically insert the recipient's name, or any other unique information for each individual.
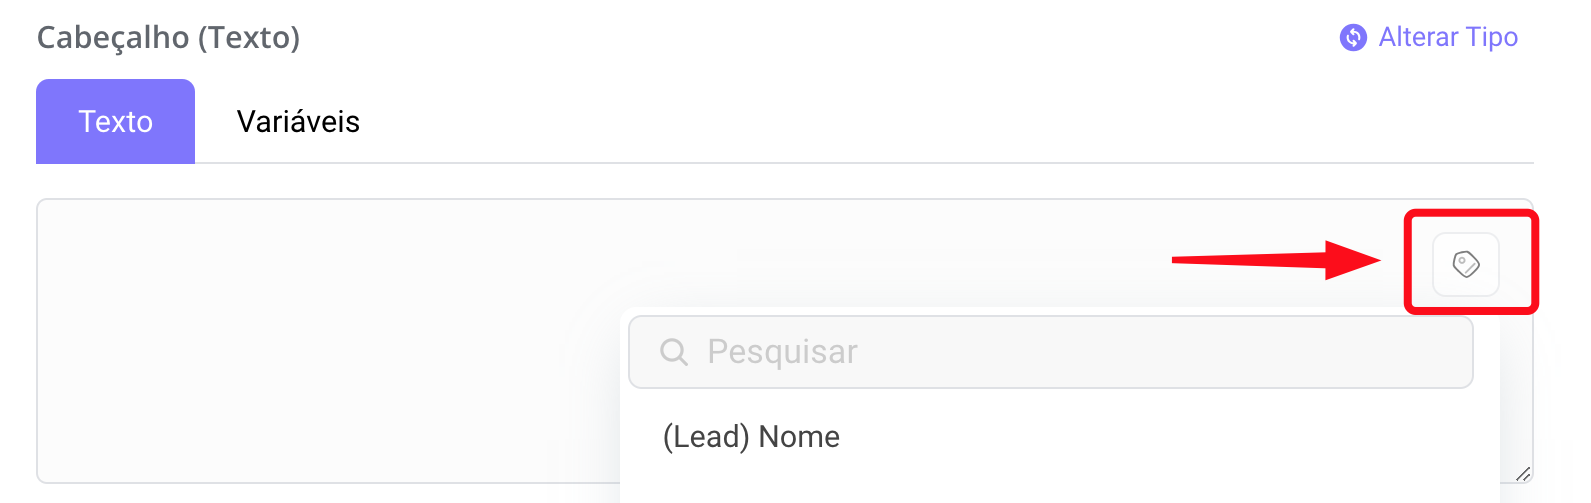
To include a variable in the message body, click the icon below and choose the data you want to add.
By clicking on "Variables", you can view the variables you have added.
**Footer**: Enter the footer message however you prefer. The footer is an area that complements the main content of the message, often including closing greetings, company contact information, useful links, or any other relevant content to close the communication.
**Actions**: Select the desired action. Among them, "**Call to action**", "**Quick reply**", or "**List message**". The actions determine how the system responds to user interactions to provide a personalized and interactive experience.
{% hint style="info" %}
**If you choose list or product, only the text header will be sent.**
{% endhint %}
* ***Call to action***
* ***Quick reply***
* ***List messages***
Create your list of items you want to send in the message template.
Click on "Configure list".
Then, configure your list however you prefer.
Next to the message template creation area, there is the **preview mode**, where you can see exactly how your template will look on WhatsApp.
**Step 5: Quick replies and Call to action**
It is also possible to configure buttons in your template, one for quick reply and the other for call to action.
* Quick reply: Where, if the customer clicks the button, it will send back to you what they want (example: "I want to access the website").
* Call to action: Where he will be directed to the website when clicking the button
**Step 6: Save and wait for the Template approval**
After configuring the template, save it and, if necessary, submit it for approval. Meta Business requires certain types of messages to be approved before being used to ensure compliance with policies.
{% hint style="warning" %}
For a Meta message template to be approved, it is necessary:
#### *1. **Relevance and Clarity***
#### *2. **Appropriate Content***
#### *3. **Compliance with Privacy Policies***
#### *4. **Correct Structure and Formatting***
{% endhint %}
{% embed url="" %}
### Another way to start creating the template
Start by accessing your **SAC 360°**. Open a support conversation carried out through an official account of the **WhatsApp API,** which is represented by the official green WhatsApp icon.
Then, in the support sidebar menu, click the **Meta icon**;
When you click, you will be directed to the window that displays the templates you created. Click on **New template**;
### Conclusion
Creating and using message templates in Meta Business, especially when integrated with SprintHub, can transform the way you communicate with your customers. This not only improves efficiency and consistency, but also ensures a more personalized and professional experience. Follow the steps mentioned in this article to start using message templates and take your customer communication to the next level. If you need assistance, the SprintHub support team is always available to help.
---
# Agent Instructions
This documentation is published with GitBook. GitBook is the documentation platform designed so that both humans and AI agents can read, navigate, and reason over technical content effectively. Learn more at gitbook.com.
## Querying This Documentation
If you need additional information that is not directly available in this page, you can query the documentation dynamically by asking a question.
Perform an HTTP GET request on the current page URL with the `ask` query parameter, and the optional `goal` query parameter:
```
GET https://docs.sprinthub.com/en/topics/relate/message-templates-meta/legacy/message-templates-how-to-create-and-send-for-approval-within-sprinthub.md?ask=&goal=
```
`ask` is the immediate question: it should be specific, self-contained, and written in natural language.
`goal` is optional and describes the broader end goal you are ultimately trying to accomplish on behalf of the user. GitBook uses it to tailor the answer towards what is most useful for that goal.
The response will contain a direct answer to the question and relevant excerpts and sources from the documentation.
Use this mechanism when the answer is not explicitly present in the current page, you need clarification or additional context, or you want to retrieve related documentation sections.