> For the complete documentation index, see [llms.txt](https://docs.sprinthub.com/llms.txt). Markdown versions of documentation pages are available by appending `.md` to page URLs; this page is available as [Markdown](https://docs.sprinthub.com/en/topics/system-settings/email/aws-ses/settings/how-to-configure-dns-records-to-connect-your-domain-in-amazon-ses-via-sprinthub.md).
# How to Configure DNS Records to Connect Your Domain in Amazon SES via SprintHub
To use Sprinthub's email sending service, which already uses Amazon SES as the infrastructure, you will need to connect your domain by adding three DNS records. This setup ensures that your emails are delivered securely and authentically.
The process is simple, as Sprinthub automatically generates the necessary records for you. Below, we detail each step.
***
#### **Why are DNS records necessary?**
DNS records are used to authenticate your domain, ensuring that email servers recognize your messages as trustworthy. This helps prevent your messages from being marked as spam. The required records are:
* **DKIM (DomainKeys Identified Mail):** Adds a digital signature to sent emails, proving their authenticity.
* **SPF (Sender Policy Framework):** Allows email servers to know that the domain is authorized to send messages through Amazon SES.
* **Verification record:** Proves that you are the owner of the domain.
***
#### **Step-by-Step Setup**
**1. Access the email settings in the Sprinthub dashboard**
In the Sprinthub admin panel:
1. Go to the section **Email** in the settings menu.
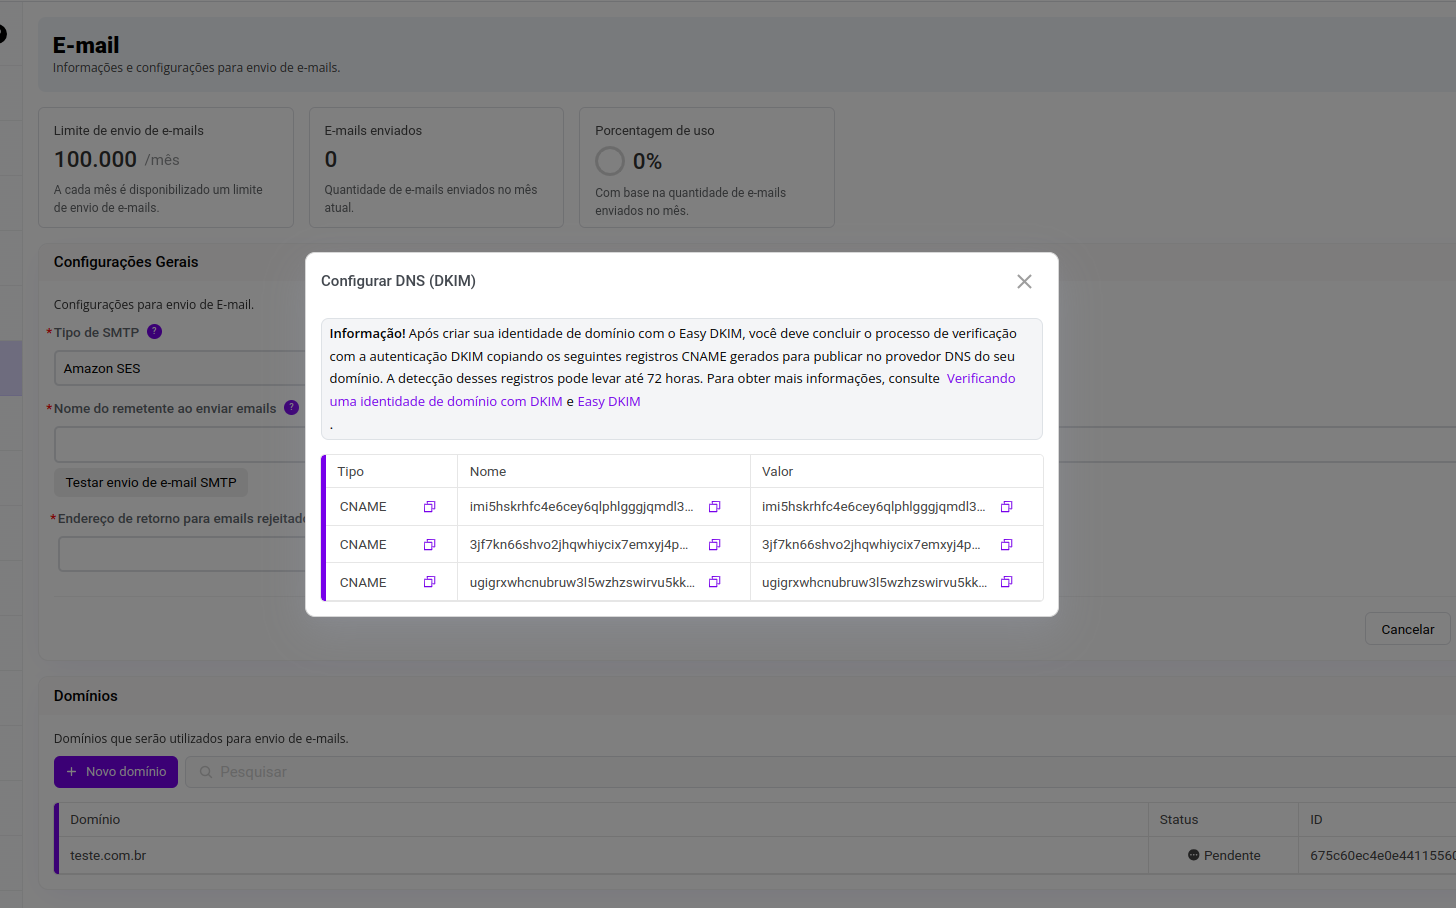
2. Choose the option for a new domain, and when adding it, click to display the necessary DNS records.
Sprinthub will automatically present the three DNS records you need to add to your domain provider.
***
**2. Add the DNS records in your domain provider**
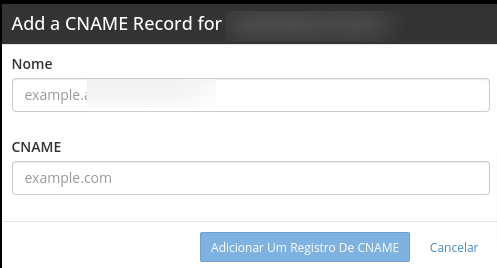
With the records generated by Sprinthub, access your domain provider's DNS management panel (e.g.: Cloudflare, GoDaddy, Registro.br); in this article we will use cPanel.
Look in cPanel for the zone editor:
Inside it there will be the domains and CNAME record to create, which is what we need; click on it and the modal to add the records will appear.
1. **Add the DKIM Records:**
* Type: CNAME
* Name: (provided by Sprinthub)
* Value: (provided by Sprinthub)
*Example:*
* Name: `imi5hskrhfc4e6cey6qlphlggjqgml3._domainkey`
* Value: `imi5hskrhfc4e6cey6qlphlggjqgml3.dkim.amazonses.com`
2. **Check the other records:**
* Repeat the process for the other CNAME records provided by Sprinthub.
3. **Save the changes:**\
After adding the records, save the settings in your provider's DNS panel.
***
**3. Wait for the records to propagate**
DNS records can take up to 72 hours to propagate, but this usually happens within a few hours.
***
#### **4. Test the setup in Sprinthub**
After the records have propagated:
1. Return to the Sprinthub dashboard.
2. Click on **SMTP email sending test**.
3. The platform will confirm whether the records are correctly configured.
***
#### **Conclusion**
Connecting your domain to Sprinthub is simple, as the platform already automatically generates the necessary records for authentication with Amazon SES. After configuring the records in your domain's DNS, you will be ready to send emails securely and with a high delivery rate.
If you have any questions during the process, contact Sprinthub support for assistance.